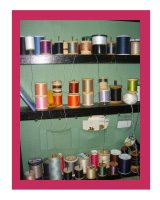
1. open the photo you wish to play with - if you like the picture, I suggest doing a "save as" to make a copy first in case things go awry and you can't undo enough to get back to the original!
2. In the menu, go to image/canvas size, and enlarge your canvas width and height by about an inch each, so that you have some border area.(so if your original image is 4 x 5, you should make it 5 x 6 or bigger)
3. Click on the color box (the black/white box) in your main menu to select a color for your frame. If you click on the black box, it should bring up a color picker - to select a color that appears in your photo, use the eyedropper tool to "suck up" color anywhere within your image - i.e.,in my sample, I took the eyedropper tool & clicked on a pink thread spool to get that pink. Then click 'okay' and that color will be your default color. Now use the paint bucket tool to 'pour' your border color all around the enlarged canvas. You should have something like this now...

4. To make your border smaller and create white space around the whole image & frame, use the rectangular marquee tool (the dotted rectangle)to select your entire photo but only about half or less of your colored border (some of the pink will be outside of the marquee on all 4 sides.) Then in your menu, click on select/inverse and your marquee will now be highlighting only the outer edge of the frame. Click backspace to delete the excess border, like this...

5. Now the fun part... Once again, use the marquee tool to draw a rectangle around your image, where the image touches your colored border; again click on select/inverse. Now click on filter/brush strokes/spatter. Select a spray radius of 25 and smoothness of 7 - then click okay. Keep clicking on filter/spatter - which should now be at the top of that menu, to increase the technique. I wanted to post another sample picture here, but I sometimes have a terrible time posting pictures - like right now. Refer to yesterday's blog for what it should look like.
6. Finally, using the marquee tool again, select just your image (no border) and then click on filter/artistic/palette knife, and select stroke size 10, stroke detail 2, and softness of 0; click okay & your image should now look like a painting.
7. Repeat step 5 to make the edges even more edgy. That's it!
Now you can use these basic techniques to try all kinds of artistic filters... and of you don't like the results, just use the edit/undo or step backward features.
No comments:
Post a Comment